For mapping regions that are mapped to external data, all program code is relocated into external data space
For memory regions that are mapped to external data, all program code is relocated into external data space and executes in external ram. External ram instructions such as MOVX can be used to modify the program. MOVC will also read from this external data space.
The view in the program memory window for these mapped regions is a view of external ram. For unmapped regions it remains a view of program memory.
When a chip reset occurs, all mapped space is re-initialised with the original program code. All modifications previously made to this space are therefore lost.
The memory mapping information is saved in the program status file when the 8051 program is closed and restored when the same program is re-opened.
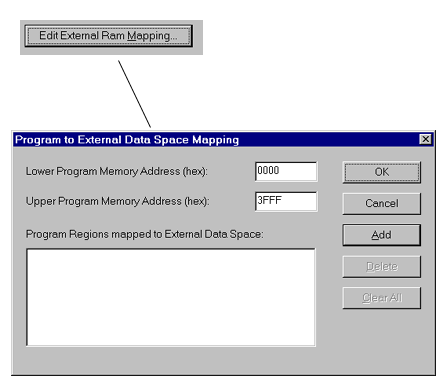
To specify your memory mapping requirements, open the memory organisation dialog box (see above) and click on the button labelled edit external ram mapping. This will the open the memory mapping dialog box.
To specify a region of program memory to be mapped to external ram, enter the lower address of the region in hexadecimal into the Lower Program Memory Address edit box and the upper address of the region into the Upper Program Memory Address edit box. (These addresses are inclusive.) Click on the Add button. The region will then be added to the list of mapped regions.
To delete a mapped region, select this region from the Program Regions mapped to External Data Space list box. The Delete button will then become bold. Click on the Delete button to delete this region from the list of mapped regions.
To delete all mapped regions, click on the Clear All button.
When you are happy with your changes, click on the OK button. To abandon your changes, click on the Cancel button. You will then be returned to the memory mapping dialog box. Click on OK in this box to confirm your changes. (If you click on Cancel your changes will be lost). The simulator will then restart your 8051 program using the new mapping settings.
