We do not need the default buttons that have been placed in the dialog box and so click on both the OK and Cancel buttons that have been created and press the Delete key to delete these.
Select Properties from the View menu. This will display the properties for the new Dialog box. Click on the drawing pin in the top left of this properties box so that it does not disappear every time you do something that does not require it.
In this properties view:
1.change the ID IDD_DIALOG1 to IDD_DIALOG_MESSAGES.
2.change the Caption from Dialog to Messages.
Click on the More Styles tab and click on the Visible item. (This is important and easy to forget. If you do not tick this item, an invisible dialog box will be created and so you will not see it.)
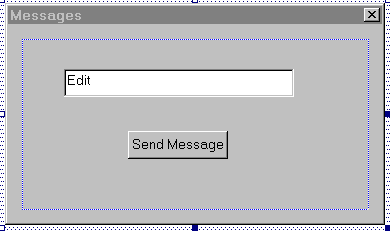
Drag an Edit box onto your new dialog box and in the Edit Box Properties, change the ID from IDC_EDIT1 to IDC_EDIT_MESSAGE.
Drag a button onto your new dialog box and in the Push Button Properties, change the ID from IDC_BUTTON1 to IDC_BUTTON_SEND. Change the Caption from Button1 to Send Message.
Your dialog box should now look something like this:

